Differences
This shows you the differences between two versions of the page.
| Both sides previous revision Previous revision Next revision | Previous revision Last revision Both sides next revision | ||
|
boards:mxchip [2015/01/05 23:21] darron |
boards:mxchip [2022/11/27 00:28] darron [Standalone demo] |
||
|---|---|---|---|
| Line 9: | Line 9: | ||
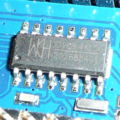
| By default, this module runs an O/S called MICO. | By default, this module runs an O/S called MICO. | ||
| - | == Pinout == | + | Whilst this module is relatively inexpensive, |
| + | |||
| + | === Pinout | ||
| < | < | ||
| | | ||
| Line 38: | Line 40: | ||
| MICO ISP | MICO ISP | ||
| ==== === | ==== === | ||
| - | STATUS | + | STATUS |
| - | BOOT | + | BOOT |
| - | EASYLINK PB8 3V3 10K BOOT0 | + | EASYLINK PB8 3V3 220R BOOT0 |
| SWD JTAG | SWD JTAG | ||
| Line 51: | Line 53: | ||
| </ | </ | ||
| - | == Probe == | + | === Probe === |
| < | < | ||
| stm32flash -b 9600 / | stm32flash -b 9600 / | ||
| Line 69: | Line 71: | ||
| </ | </ | ||
| - | == Modes == | + | === Modes === |
| ^ BOOT PB1 ^ STATUS PB9 ^ Mode of operation | | ^ BOOT PB1 ^ STATUS PB9 ^ Mode of operation | | ||
| | 0 | | 0 | ||
| Line 75: | Line 77: | ||
| | 1 | | 1 | ||
| - | == Firmware update mode == | + | === Firmware update mode === |
| The bootloader is entered by holding PB1 low and PB9 high. | The bootloader is entered by holding PB1 low and PB9 high. | ||
| < | < | ||
| Line 98: | Line 100: | ||
| </ | </ | ||
| - | == Firmware update == | + | === Firmware update |
| Minicom may be used to send a file using the ymodem protocol. | Minicom may be used to send a file using the ymodem protocol. | ||
| Line 128: | Line 130: | ||
| </ | </ | ||
| - | == Flash memory map == | + | === Flash memory map === |
| ^Address | ^Address | ||
| |0x8000000 |Boot loader| | |0x8000000 |Boot loader| | ||
| Line 135: | Line 137: | ||
| |0x8060000 |Temporary | |0x8060000 |Temporary | ||
| |0x80C0000 |RF driver| | |0x80C0000 |RF driver| | ||
| + | |||
| + | === Standalone demo === | ||
| + | |||
| + | Install [[: | ||
| + | |||
| + | Install [[: | ||
| + | |||
| + | Enter ST ISP mode using BOOT0, RX and TX as shown in the pinout above. | ||
| + | |||
| + | Fetch the demo and edit the Makefile, change the serial device to your host device (TTYISP). | ||
| + | < | ||
| + | hg clone http:// | ||
| + | cd miniblink-emw | ||
| + | vi Makefile | ||
| + | </ | ||
| + | |||
| + | Now, backup the chip, load standalone demo and run it. | ||
| + | < | ||
| + | make backup | ||
| + | make stm32flash | ||
| + | </ | ||
| + | |||
| + | You can restore the MICO O/S from the emw3162.bin file, do not overwrite it.\\ | ||
| + | Eg. | ||
| + | < | ||
| + | stm32flash -w emw3162.bin -b 115200 / | ||
| + | </ | ||
| + | |||
| + | ===Resources=== | ||
| + | |||
| + | [[https:// | ||