Differences
This shows you the differences between two versions of the page.
|
projects:esp [2015/02/04 18:16] darron [24LC512] |
projects:esp [2017/01/12 22:44] |
||
|---|---|---|---|
| Line 1: | Line 1: | ||
| - | ==== Extrasensory perception for ESP-01 & RPi ==== | ||
| - | <wrap right> | ||
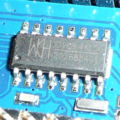
| - | {{: | ||
| - | \\ \\ | ||
| - | {{: | ||
| - | </ | ||
| - | This project adds three I2C devices to an [[: | ||
| - | |||
| - | The three devices are a Microchip MCP23016 digital I/O expander, NXP PCF8591 ADC/DAC and Microchip 24LC512 EEPROM. | ||
| - | |||
| - | These were chosen because they add useful capabilities to the ESP-01 or RPi and all three are available in DIP format from CPC in the United Kingdom. | ||
| - | |||
| - | === Schematic === | ||
| - | |||
| - | {{: | ||
| - | |||
| - | === I2C bus === | ||
| - | |||
| - | ^Address ^Device | | ||
| - | |0x20 |MCP23016| | ||
| - | |0x48 |PCF8591| | ||
| - | |0x50 |24LC512| | ||
| - | |||
| - | Probing the bus on the RPi with [[: | ||
| - | < | ||
| - | i2cdetect -y 1 | ||
| - | | ||
| - | 00: -- -- -- -- -- -- -- -- -- -- -- -- -- | ||
| - | 10: -- -- -- -- -- -- -- -- -- -- -- -- -- -- -- -- | ||
| - | 20: 20 -- -- -- -- -- -- -- -- -- -- -- -- -- -- -- | ||
| - | 30: -- -- -- -- -- -- -- -- -- -- -- -- -- -- -- -- | ||
| - | 40: -- -- -- -- -- -- -- -- 48 -- -- -- -- -- -- -- | ||
| - | 50: 50 -- -- -- -- -- -- -- -- -- -- -- -- -- -- -- | ||
| - | 60: -- -- -- -- -- -- -- -- -- -- -- -- -- -- -- -- | ||
| - | 70: -- -- -- -- -- -- -- -- | ||
| - | </ | ||
| - | === MCP23016 === | ||
| - | |||
| - | ^Control ^Register ^Function | | ||
| - | |0 | ||
| - | |1 | ||
| - | |2 | ||
| - | |3 | ||
| - | |6 | ||
| - | |7 | ||
| - | |||
| - | To use the MCP23016 first set the GPIO direction register. Microchip use 1 for input and 0 for output. After that you can either read the input register or write to the output register. | ||
| - | |||
| - | == ESP-01 NodeMcu == | ||
| - | |||
| - | First we need eSPY, fetch and build it. The examples below come with the source. | ||
| - | < | ||
| - | hg clone http:// | ||
| - | cd epsy | ||
| - | make | ||
| - | </ | ||
| - | |||
| - | This example script blinks an LED attached to the MCP23016 GP0.0 pin. | ||
| - | < | ||
| - | #!espy / | ||
| - | |||
| - | -- pin 3 = GPIO0 | ||
| - | sda=3 | ||
| - | |||
| - | -- pin 4 = GPIO2 | ||
| - | scl=4 | ||
| - | |||
| - | -- init I2C | ||
| - | i2c.setup(0, | ||
| - | |||
| - | -- write MCP | ||
| - | function write_mcp(control, | ||
| - | i2c.start(0) | ||
| - | i2c.address(0, | ||
| - | i2c.write(0, | ||
| - | i2c.write(0, | ||
| - | i2c.stop(0) | ||
| - | end | ||
| - | |||
| - | -- init GP0.0 | ||
| - | write_mcp(2, | ||
| - | write_mcp(6, | ||
| - | |||
| - | -- blink LED on GP0.0 3 times | ||
| - | for i = 1, 3, 1 do | ||
| - | write_mcp(2, | ||
| - | print (" | ||
| - | tmr.delay(1000000) | ||
| - | write_mcp(2, | ||
| - | print (" | ||
| - | tmr.delay(1000000) | ||
| - | end | ||
| - | </ | ||
| - | |||
| - | The script comes with the eSPY application and can be demomstrated thus. | ||
| - | < | ||
| - | ./mcp.esp | ||
| - | off | ||
| - | on | ||
| - | off | ||
| - | on | ||
| - | off | ||
| - | </ | ||
| - | |||
| - | == RPi == | ||
| - | |||
| - | [[: | ||
| - | |||
| - | Here we clear the output latch, set GP0.0 to an output, then set the pin high on the RPi. | ||
| - | < | ||
| - | i2cset -y 1 0x20 2 0 | ||
| - | i2cset -y 1 0x20 6 0xFE | ||
| - | i2cset -y 1 0x20 2 1 | ||
| - | </ | ||
| - | |||
| - | Now on the RPi we set GP1.0 as an input then read it twice. The first read is with GP1.0 taken | ||
| - | low and the second read with GP1.0 taken high. | ||
| - | < | ||
| - | i2cset -y 1 0x20 7 1 | ||
| - | i2cget -y 1 0x20 1 | ||
| - | 0xde | ||
| - | i2cget -y 1 0x20 1 | ||
| - | 0xdf | ||
| - | </ | ||
| - | |||
| - | Please refer to the [[# | ||
| - | |||
| - | === PCF8591 === | ||
| - | ^Control ^Register | ||
| - | |0 | channel 0 |Read ADC 0| | ||
| - | |1 | channel 1 |Read ADC 1| | ||
| - | |2 | channel 2 |Read ADC 2| | ||
| - | |3 | channel 3 |Read ADC 3| | ||
| - | |+64 | analog OE |DAC output| | ||
| - | |||
| - | To write to the DAC, we set the control to 64 and write a value between 0 and 255 which represents 0 to VREF volts on the output pin. | ||
| - | |||
| - | To read from an ADC, we first send a control representing the channel, then we perform two reads. The first read starts the conversion process and the second read fetches the result (this also starts another conversion). | ||
| - | |||
| - | If we are using the DAC, then we must also set the analog OE bit else the DAC will be disabled. | ||
| - | |||
| - | == ESP-01 NodeMcu == | ||
| - | |||
| - | A simple ramp demo can be achieved like this with NodeMcu on the ESP-01. | ||
| - | < | ||
| - | #!espy / | ||
| - | |||
| - | -- pin 3 = GPIO0 | ||
| - | sda=3 | ||
| - | |||
| - | -- pin 4 = GPIO2 | ||
| - | scl=4 | ||
| - | |||
| - | -- init I2C | ||
| - | i2c.setup(0, | ||
| - | |||
| - | -- write DAC | ||
| - | function write_dac(control, | ||
| - | i2c.start(0) | ||
| - | i2c.address(0, | ||
| - | i2c.write(0, | ||
| - | i2c.write(0, | ||
| - | i2c.stop(0) | ||
| - | end | ||
| - | |||
| - | -- DAC output | ||
| - | for i = 0, 255, 10 do | ||
| - | write_dac(64, | ||
| - | print (i) | ||
| - | tmr.delay(100000) | ||
| - | end | ||
| - | </ | ||
| - | |||
| - | When the script is run with eSPY we can see the DAC output ramp up and a running commentary. | ||
| - | < | ||
| - | 0 | ||
| - | 10 | ||
| - | 20 | ||
| - | 30 | ||
| - | ... | ||
| - | 230 | ||
| - | 240 | ||
| - | 250 | ||
| - | </ | ||
| - | |||
| - | == RPi == | ||
| - | |||
| - | Using [[: | ||
| - | < | ||
| - | i2cset -y 1 0x48 64 0 | ||
| - | i2cset -y 1 0x48 64 128 | ||
| - | i2cset -y 1 0x48 64 255 | ||
| - | </ | ||
| - | |||
| - | With a potentiometer connected to AIN0 a reading was made on the RPi. | ||
| - | < | ||
| - | i2cset -y 1 0x48 64 ; i2cget -y 1 0x48 ; i2cget -y 1 0x48 | ||
| - | 0x1b | ||
| - | 0x8d | ||
| - | </ | ||
| - | The second value above is the new reading, the first is the previous reading. | ||
| - | |||
| - | This is simplified view of the operation of this device. Please read the [[# | ||
| - | |||
| - | === 24LC512 === | ||
| - | |||
| - | I2C EEPROMs have varied addressing schemes. The simplest is a 8-bit address offset, another one where a block selection is made with an I2C address and a byte selection is made with an 8-bit address offset. Yet another, where the I2C address is fixed but it now has a 16-bit address offset and lastly one with both of the last methods combined. | ||
| - | |||
| - | The 24LC512 which uses 16-bit addressing. The addressing byte order is high byte, low byte. | ||
| - | |||
| - | == ESP-01 NodeMcu == | ||
| - | |||
| - | On the ESP-01 we can use this NodeMcu LUA script to read the EEPROM. | ||
| - | < | ||
| - | #!espy / | ||
| - | |||
| - | -- pin 3 = GPIO0 | ||
| - | sda=3 | ||
| - | |||
| - | -- pin 4 = GPIO2 | ||
| - | scl=4 | ||
| - | |||
| - | -- init I2C | ||
| - | i2c.setup(0, | ||
| - | |||
| - | -- read EEPROM | ||
| - | function read_eeprom(addrhigh, | ||
| - | i2c.start(0) | ||
| - | i2c.address(0, | ||
| - | i2c.write(0, | ||
| - | i2c.write(0, | ||
| - | i2c.stop(0) | ||
| - | |||
| - | i2c.start(0) | ||
| - | i2c.address(0, | ||
| - | c=i2c.read(0, | ||
| - | i2c.stop(0) | ||
| - | return c | ||
| - | end | ||
| - | |||
| - | -- read byte | ||
| - | reg = read_eeprom(0x00, | ||
| - | |||
| - | -- output byte | ||
| - | print(string.byte(reg)) | ||
| - | </ | ||
| - | |||
| - | Here the script is executed using eSPY. | ||
| - | < | ||
| - | ./ | ||
| - | 238 | ||
| - | </ | ||
| - | |||
| - | eSPY is still being developed and as yet doesn' | ||
| - | |||
| - | == RPi == | ||
| - | |||
| - | On the RPi we can reset the internal address pointer of the chip to 0 like this. | ||
| - | < | ||
| - | i2cset -y 1 0x50 0 0 | ||
| - | </ | ||
| - | |||
| - | To read, we first write an address to start at then begin reading, if we keep reading the address is auto-incremented. | ||
| - | < | ||
| - | i2cset -y 1 0x50 0 0 | ||
| - | i2cget -y 1 0x50 | ||
| - | 0x55 | ||
| - | i2cget -y 1 0x50 | ||
| - | 0xaa | ||
| - | </ | ||
| - | |||
| - | If we want to write to a location we send the address followed by the byte of data. | ||
| - | < | ||
| - | i2cset -y 1 0x50 0 0 0xEE i | ||
| - | i2cset -y 1 0x50 0 0 | ||
| - | i2cget -y 1 0x50 | ||
| - | 0xee | ||
| - | </ | ||
| - | |||
| - | This overview gives enough information to use the device at a byte level, read the [[# | ||
| - | |||
| - | === Resources === | ||
| - | [[http:// | ||
| - | [[http:// | ||
| - | [[http:// | ||